Sunday, May 29, 2011

Peter Pan and Tinkerbell Costumes


We recently went to a Tinkerbell Party.  I made the effort to dress up the children in costumes which of course I made.  The boys went as Peter Pan and Ada as a fairy.  It was so much fun and I can't wait till the next excuse to make and dress up my children in costumes!


The headband I made at the last minute!

Hooded Sweater Attempt One - Fail....


For a long time now I have been wanting to make my boys some Hooded Pull-Over Sweaters.  They look so cute and serve a purpose for Mr 2 Year Old - he can't pull them off as easy as he can zip front's.  Problem I have come across is that I haven't been able to find a pattern for them.  You would think they would be a pattern 'staple', but no - its been near impossible.

So I took the leap and attempted to create my own pattern.  Which was brave of me considering my extremely limited experience with patterns and sewing.  I had a few sweater patterns (minus hoodie) in larger sizes and a much loved hoodie to copy from.

It went OK, but I majorly failed on the hood.  It was smaller than the neckline, so doesn't reach together at the front as it should.  It does look a bit funny, as you can probably tell in the photo above.  Jack wouldn't let me take a decent photo of him wearing it, unfortunately the above is the best of a bad bunch!  Apart from that, the rest of the sweater is OK.  Jack of course loves it, as I have appliqued it with Lightening McQueen, and even went to sleep in it the first night I finished it.  That alone is worth the fustration of stuffing up the hood!

I have now finally managed to source a 'vintage' pattern off Trade Me in sizes 4 - 7 which I am waiting for to turn up in the post.  Hopefully the next sweater creation I post will have a hood that fits, and, as my kindly, patient husband called it "doesn't look weird or abnormal".  Watch this space...

Tuesday, May 17, 2011

Make a Mermaid Dress Up Tail


It is my niece's 4th birthday coming up this weekend, and she loves to dress up.  A while back I saw some great dress up mermaid tails for sale and instantly thought of her - but of course now when I want to buy one I can't find them.  So I made my own and I am so happy with how it turned out!

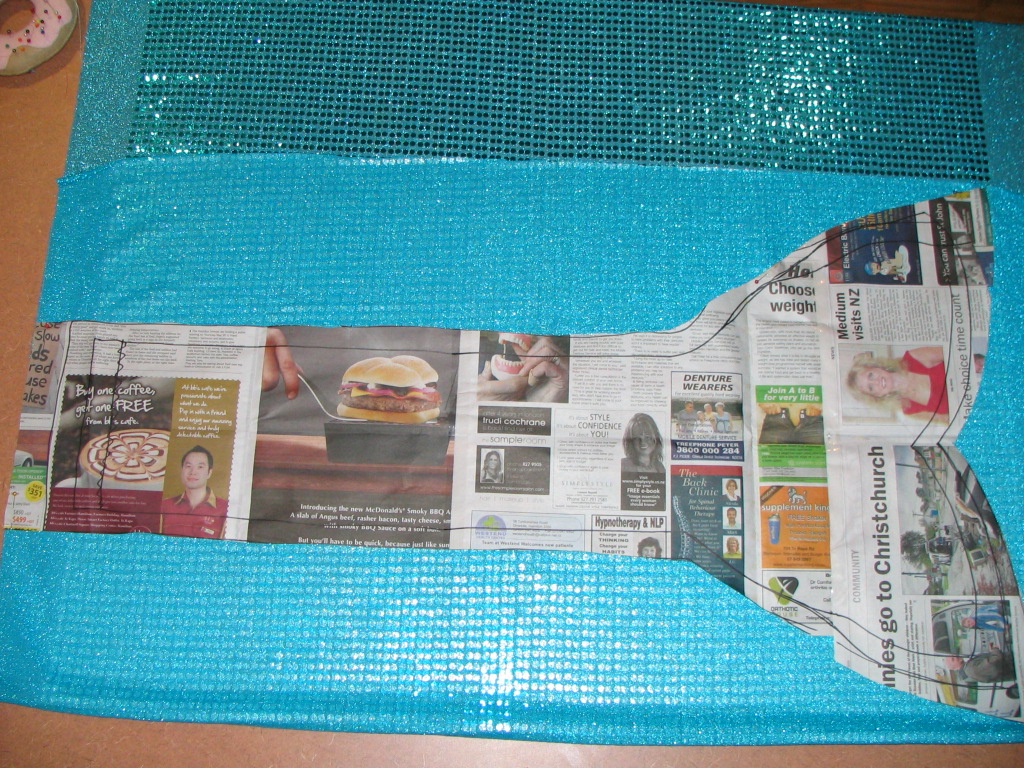
First I measured my 4 year old son to get measurements - he and his cousin are around the same size.  He was 22" from waist to floor and I figured if the tail was around 7" across the back it'd fit well.  I wanted the tail to sweep behind her, so aimed to make the finished tail around 36" long.

Then I drew my pattern out on newspaper.  This took a bit of tweaking to get it right - I included a 1.5cm (sorry for jumping between inches and centimetres) hem allowance.  Note - when drawing the bottom of the tail it pays to fold the paper in half so you can mirror the tail fins exactly.


Then I folded my material in half, right sides facing and pinned and cut out the tail.


 I wanted the tail to have some body to it, so I then cut out two pieces of quilt batting to add to the inside.


So now I have four pieces (2 x material and 2 x wadding).  I put the wadding together and on top of that placed the material pieces, with right sides together, as shown:


And pinned around the whole tail.  Then I sewed it all together with a 1.5cm hem allowance, leaving the top of the tail open to allow it to be turned inside out.

Once sewn, I trimmed off the excess batting and the corners so it wasn't bulky when turning inside out.


Right, so now I turned it inside out.  Looking good but it still didn't look finished, so I decided to sew a 'spine' down the middle of the tail.  I measured and pinned a centre line to follow.


 And then sewed down the centre, and branched off at the bottom to sew towards each corner of the fins.


Here I got a bit carried away in wanting to get it finished and sewed in my elastic without photo recording, so will explain it here step by step.

1) Measured my sons waist which was 21.5".  The tail was already 7" across, so cut a 15" length of elastic (allowing a bit for the hems and want it to be a bit tighter anyway)
2) I folded over the top hem of the tail and pinned so the rough edge was hidden (folded under)
3) I pinned the elastic into each 'side' of the hem, so it formed a loop with the top of the tail
4) I triple sewed in one end of the elastic, then continued to sew along the folded over hem to the other side, and then triple sewed the other end of elastic
5) I then went back and zig zag stitched over each sewn in bit of elastic to secure again.

And there I have it - one awesome mermaid tail which I am sure my niece will get hours of play from!


Monday, May 16, 2011

Baby Play Mat


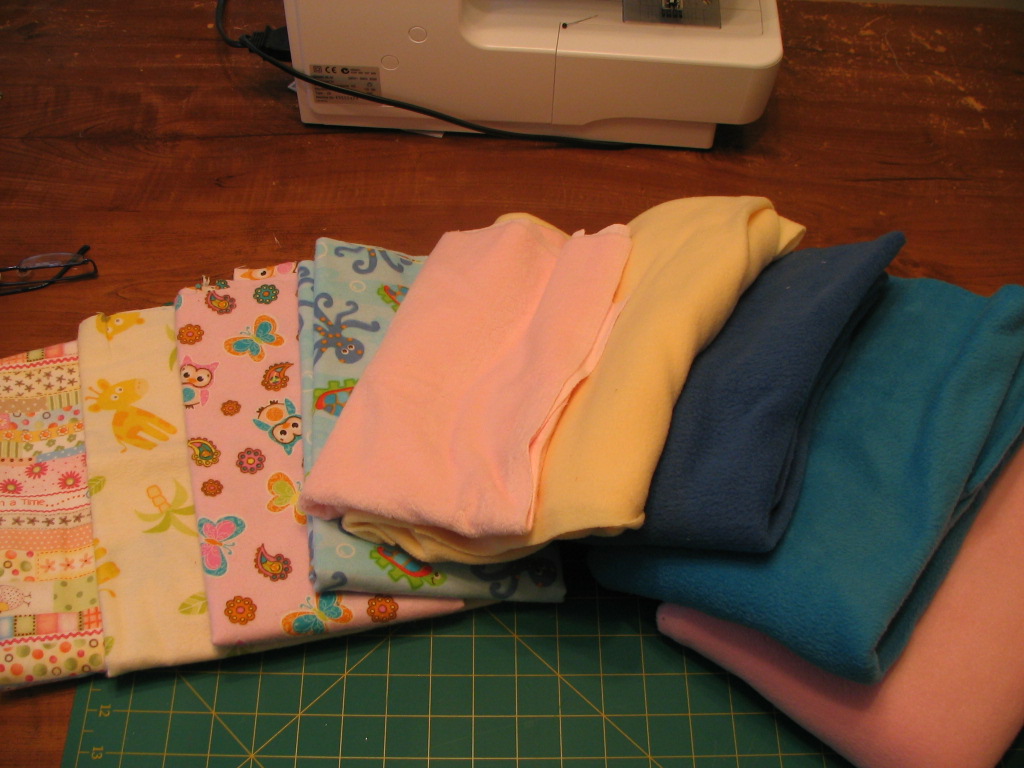
I was given a set of 5 fat quarters for Christmas that I just didn't know what to do with.  Ada seems to spend a lot of time dumped on the floor on top of whatever is handy - towels, jumper, blankets etc - so it just seemed logical to make her a play mat.

I really wanted to design my own, but being rather new to quilting didn't trust my skill to get it right - so I followed the link here for the above design : http://neverenoughhours.blogspot.com/2010/08/fat-quarter-baby-quilt-tutorial.html

Really, really easy and one happy baby!

Wednesday, May 11, 2011

Sock Monkey


I have wanted to make a cute little sock monkey for a while now, and over the weekend found these awesome socks that were just screaming sock monkeys!!

I followed the instructions at http://www.web-goddess.org/writing/tutorial/Image0.html which are brilliant and easy to understand.

Not entirely happy with my first attempt - he is a little bit wonky but still very loveable and snuggly.  I didn't use button eyes as have two under 3's at home, and he hasn't got a mouth.  Think I will put one on him eventually.  Have made a start on two more so hopefully with a bit of practice they will come out a bit better.  Still, he has pleased the kids and that is what matters!


Tuesday, May 3, 2011

Condensed Milk Slice


I have had this recipe knocking around for years and have never made it.  Now that I have, I don't think I can stop making it!!  Its amazing.  I tried to get decent photos of it but it seems I need some practice in food photography, but trust me when I say its divine!

I tweaked the recipe I had to suit my tin.

You need:

1 250gram packet of malt biscuits
110grams of melted butter
1 cup of dark chocolate drops
1 1/4 cups of shredded coconut
1 cup of chopped blanched peanuts
400g can sweetened condensed milk

Preheat oven to 180 degrees.  Process biscuits in a food processor until they resemble fine crumbs.  Add the melted butter and mix well.

Press crumbs into the base of a lined slice tin (mine is 28cm x 19cm).

Sprinkle over chocolate drops and coconut, and then top with nuts.

Evenly drizzle over the sweetened condensed milk.  Bake for 25 minutes and when cool cut into slices.  Enjoy!

Monday, May 2, 2011

Taggy Blankets


I've been making these Taggy Blankets since I had Jack - 4 years ago.  There are a few new babies arriving in my family in the next few months so I decided now is a good time to stock up on taggies as they make great gifts.  They are so simple to make - here is how I do it.

You will need two x 30cm squares of fabric, 12 x 13cm lengths of ribbon, scissors, pins, thread and a sewing machine.

Choose your fabric - obviously the choices are endless but I personally like to use flannelette and polar fleece.  I recommend using soft fabrics as babies just love snuggly soft material.


Cut out two squares of your chosen fabric.  I use a 30cm x 30cm square, but you can do any size that suits you.


Then cut out your ribbons.  I put three ribbons per side of my square, and use a 13cm long ribbon piece. 


Pin your ribbon, folded in half with the open ribbon edges matching the fabric edge, to the right side of your fabric.  I pin to the flannelette as its not as stretchy as the polar fleece so easier to work with.  I never measure where I want the ribbons to go, I just pin them on.


I now sew each ribbon on as close to the edge of the fabric as possible, removing the pins as I go.


Once all the ribbons are sewn on, I pin the two fabrics with right sides facing together.  Be sure here that all ribbons are lying flat.


Then I sew around the square, using a 1.5cm hem, leaving an open gap of around 4 cms where I can turn the taggy inside out.  On sewing the corners, instead of sewing a rightangle on the corner, I sew three or four stitches across a diagonal before continuing to sew down the side.  I think this makes for a nicer finish on the corners.


Once sewn, I trim off the corners so its tidier when turned inside out.  You can see here what I mean about sewing on the diagonal.


Then I turn the taggy inside out.


And smooth it out just using my hands.  If you decide here to iron be very careful, ribbon melts!!  I pin the opening closed, and then sew around the outside again as close to the edge as possible, closing up the opening as I go.


And there you have a Taggy Blanket.  Nice and safe as the ribbons are sewn in three times and babies just love them!  Here is Ada giving her one a trial run.